Наръчник Flymo SimpliGlide 300 Косачка за трева

Нуждаете се от ръководство за Flymo SimpliGlide 300 Косачка за трева? По-долу можете да видите и изтеглите PDF ръководството безплатно на български език. В момента този продукт има 8 често задавани въпроси, 0 коментари и има 0 гласа. Ако това не е ръководството, което искате, моля свържете се с нас.

Продуктът ви дефектен ли е и ръководството не предлага решение? Отидете в Repair Café за безплатни ремонтни услуги.

Наръчник

Maintenance and storage
a) Keep all nuts, bolts, and screws tight to be sure the machine is in safe
working condition.
b) Check the grass collector frequently for wear or deterioration.
c) Replace worn or damaged parts for safety.
d) On machines with multi blade, take care as rotating one blade can cause
other blades rotate.
e) Be careful during adjustment of the machine to prevent entrapment of the
fingers between moving blades and fixed parts of the machine.
f) Always allow the machine to cool down before storing.
g) When servicing the blades be aware that, even though the power source is
switched off, the blades can still be moved.
h) Use only genuine replacement parts and accessories.
Additional safety warnings
Electrical safety
DANGER! Cardiac arrest!
This product makes an electromagnetic field while it operates. This field
may under some conditions interfere with active or passive medical
implants. To decrease the risk of conditions that can possibly injure or
kill, we recommend persons with medical implants to speak with their
physician and the medical implant manufacturer before you operate the
product.
Before use, examine the cable for signs of damage or ageing. If the cable is
found to be defective, take the product to an authorised Service Centre and have
the cable replaced.
Do not use the product if the electric cables are damaged or worn.
Immediately disconnect from the mains if the cable is cut, or the insulation is
damaged. Do not touch the electric cable until the cable has been disconnected.
Do not repair a cut or damaged cable. Replace it with a new one.
The extension cable must be uncoiled. Coiled cables can overheat and reduce
the efficiency of your mower.
Keep the extension cable away from product, always work away from the power
point mowing up and down, never in circles.
Do not pull cable around sharp objects.
Always switch off at the mains before disconnecting any plug, cable connector
or extension cable.
Stop the motor, disconnect the mains and examine the cable for damage or
ageing before you wind the cable for storage. Do not repair a damaged cable,
replace it with a new one. Use only genuine replacement cable.
Always wind the cable carefully, avoid kinking.
Do not carry the product by the cable.
Do not pull on the cable to disconnect any of the plugs.
Use only on AC mains supply voltage shown on the product rating label.
Our products are double insulated to EN60335. Do not connect an earth to
any part of the product.
Check the working area for hidden cables.
Do not use for pond care or close to water.
Personal safety
DANGER! Risk of suffocation!
Small parts can be easily swallowed. There is also a risk that the poly-
bagcan suffocate toddlers. Keep toddlers away when you assemble the
product.
Let the hover mower to cool down for at least 30 minutes before storage or
maintenance.
If blockage of cutting element stop product and check.
Do not tilt the machine into the direction of the user.
Do not move backwards.
Stay alert during operation.
Do not use in explosive atmosphere.
Do not operate the product when you are tired, ill or under the influence of
alcohol, drugs or medicine or when you are exhausted.
Do not overload the mower.
Use gloves, wear slip resistant shoes and wear eye protection.
Do not use under wet conditions.
Do not use on wet grass.
Do not disassemble the product further than the delivery status.
Only start the mower with an upright standing handle.
Do not use the start levers alternately.
Use the handles carefully.
Safety Cut-Out
The motor is protected by a Safety Cut-Out which is activated when the blade
becomes jammed or if the motor is overloaded. When this occurs, stop and dis-
connect the product from the mains. The Safety Cut-Out will only reset when you
release the start / stop lever. Clear any obstruction and wait for a few minutes for
the Safety Cut-Out to reset before you continue to use the product.
2. ASSEMBLY
DANGER! Risk of injury!
Cut injury when the product starts accidentally.
v Wait for the blade to stop, disconnect the product from the
mains and use gloves before you assemble the product.
To assemble the lower handle [ Fig. A1 ]:
1. Place the end of the lower handle
1
into the slots on the deck
2
.
2. Secure the lower handles
1
to the deck
2
by firmly pushing fixing
pin
3
through the holes in the deck
2
and handle
1
.
3. Repeat on the other side.
NOTE: Should a problem occur when securing the handle to the deck
with the fixing pin, carefully lever fixing pin out of location and repeat
steps 1 to 3 above.
To assemble the upper handle [ Fig. A2 / A3 ]:
1. Make sure that the upper handle
4
is located correctly with the safety
lock-off button
5
on the switchbox facing upwards.
2. Make sure that the upper handle
4
and the lower handle
1
are aligned
correctly.
3. Insert the nut into the handle knob
6
(if necessary).
4. Fit the bolts
8
, the washers
7
and the handle knobs
6
onto the
handles
1
/
4
in the correct positions.
5. Attach the cable
9
to the handles
1
/
4
with the clips
0
provided.
Make sure that the cable
9
is not trapped between the upper
handle
4
and lower handle
1
.
3. OPERATION
DANGER! Risk of injury!
Cut injury when the product starts accidentally.
v Wait for the blade to stop, disconnect the product from
the mains and use gloves before you adjust or transport
the product.
To connect the mower [ Fig. O1 / O2 ]:
DANGER! Electric shock!
To avoid damage to the extension cable
q
, the extension
cable
q
must be inserted into the cable lock
-
.
v Before you operate insert the extension cable
q
into the cable
lock
-
.
1. Connect the female extension cable
q
connector to the back of the
switchbox
w
.
2. Form a loop in the extension cable
q
, insert the loop into the cable
lock
-
slot in the switchbox
w
and pull tight.
3. Connect the extension cable
q
into a 230 V mains socket.
To adjust the cutting height [ Fig. O3 / O4 / O5 ]:
CAUTION! Do not use more than 3 cutting height
spacers
e
. The cutting height spacers
e
must only be fitted
between the blade
r
and the fan
t
. Do not fit the cutting height
spacers
e
between the blade
r
and the blade bolt
z
.
1. To remove the blade bolt
z
, hold the fan
t
firmly and loosen the blade
bolt
z
with the spanner
u
provided.
2. Remove the blade bolt
z
, the blade
r
, the cutting height spacers
e
and the fan
t
.
3. Inspect for damage and clean as necessary.
4. Put the fan
t
on the product.
Make sure that the fan
t
is fully in place and the hole of the fan is inline
up with the threaded hole.
5. Put the cutting height spacers
e
onto the fan
t
.
Higher Cut – less cutting height spacers
Lower Cut – more cutting height spacers
Make sure that the pegs have located into the holes.
6. Put the blade
r
on by aligning the D-shaped holes onto the cutting
height spacers
e
.
Make sure that the pegs have located into the holes on the blade.
EN
5
Page 2 width 2 mm less: 208 mm
SG300EU-20.960.01.indd 5 24.10.20 07:07
Изтегли ръководство на български (PDF, 9.64 MB)
(Помислете за околната среда и отпечатайте това ръководство само ако наистина е необходимо)

оценка

Кажете ни какво мислите за Flymo SimpliGlide 300 Косачка за трева, като дадете оценка на продукта. Искате ли да споделите опита си с този продукт или да зададете въпрос? Моля, оставете коментар в долната част на страницата.
Доволни ли сте от Flymo SimpliGlide 300 Косачка за трева?
да Не
Бъдете първи, оценили този продукт
0 гласове

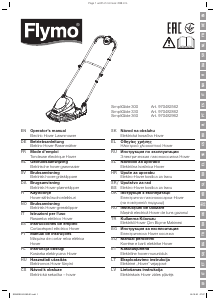
Присъединете се към разговора за този продукт

Тук можете да споделите какво мислите за Flymo SimpliGlide 300 Косачка за трева. Ако имате въпрос, първо прочетете внимателно ръководството. Заявката за ръководство може да бъде направена чрез нашата форма за контакт.

Повече за това ръководство

Разбираме, че е хубаво да имате хартиено ръководство за вашия Flymo SimpliGlide 300 Косачка за трева. Винаги можете да изтеглите ръководството от нашия уебсайт и да го отпечатате сами. Ако искате да имате оригинално ръководство, препоръчваме ви да се свържете с Flymo. Може да са в състояние да предоставят оригинално ръководство. Търсите ли ръководството на вашия Flymo SimpliGlide 300 Косачка за трева на различен език? Изберете предпочитания от вас език на началната ни страница и потърсете номера на модела, за да видите дали го предлагаме.

Спецификации

Марка Flymo
Модел SimpliGlide 300
Категория Косачки за трева
Тип файл PDF
Размер на файла 9.64 MB

Всички ръководства за Flymo Косачки за трева
Още ръководства на Косачки за трева

Често задавани въпроси за Flymo SimpliGlide 300 Косачка за трева

Нашият екип за поддръжка търси полезна информация за продукта и отговори на често задавани въпроси. Ако откриете неточност в нашите често задавани въпроси, моля, уведомете ни, като използвате нашата форма за контакт.

Как да разбера кога да наточа ножовете на моята косачка? Проверен

Остри остриета чисто подрязват тревата. Тъпите остриета разкъсват грубо тревата, която бързо ще покафенее. Ако косачката произвежда накъсана трева, остриетата трябва да се наточат или сменят.

Това беше полезно (2379) Прочетете още

Какво е мулчиране? Проверен

Някои косачки могат да мулчират. Мулчирането фино раздробява тревата и я издухва обратно към моравата. Там мулчът изпълнява ролята на подхранване и защита на тревата.

Това беше полезно (781) Прочетете още

Случайно сложих дизел в моята бензинова косачка, какво да правя? Проверен

НЕ използвайте косачката. Единствената възможност е напълно да изпразните резервоара и да го напълните с правилното гориво.

Това беше полезно (710) Прочетете още

Каква е най-добрата дължина за моята трева? Проверен

За да предотвратите изсъхването на тревата, тя не трябва да бъде твърде къса. По-добре е да косите тревата по-често, отколкото да я косите твърде късо. Оптималната дължина е между 3 и 4 сантиметра.

Това беше полезно (414) Прочетете още

Мога ли да кося трева, когато е мокра? Проверен

Възможно е, но не е препоръчително. Когато тревата е мокра, тя ще се скупчи по време на косене, предотвратявайки оптималния резултат.

Това беше полезно (276) Прочетете още

Кой е подходящият момент да кося тревата си? Проверен

Най-добрите месеци за косене на трева са от март до октомври. Косенето трябва да се извършва веднъж или два пъти седмично в зависимост от това колко бързо расте тревата. Най-доброто време от деня за косене на тревата е в края на следобеда и никога на пълна слънчева светлина. Това е, за да се предотврати изсъхването на тревата след косене.

Това беше полезно (254) Прочетете още

За каква тревна площ да избера електрическа косачка и за каква бензинова косачка? Проверен

За повърхности до 300 m² можете да използвате косачка, задвижвана от батерии. За по-големи повърхности от това се препоръчва използването на бензинова косачка.

Това беше полезно (201) Прочетете още

Мога ли да оставя косачка робот да работи през нощта? Проверен

По-добре е да не оставяте косачка робот да работи през нощта. Някои животни, като таралежите, са активни предимно през нощта. Те често не са достатъчно бързи, за да избягат от косачката-робот и могат да бъдат тежко ранени или убити.

Това беше полезно (195) Прочетете още
Наръчник Flymo SimpliGlide 300 Косачка за трева

Свързани продукти

Свързани категории